


Howto Install Wordpress via Hoopla Hosting using Wordpress Toolkit
Installing WordPress is easy with Hoopla Hosting
Requirements: cPanel access, Client Area Access, Live domain or subdomain live on your hosting account.
How do I login to cPanel?
- Access your client area, Click on Services, Select your Hosting service.
- Click on Log in to cPanel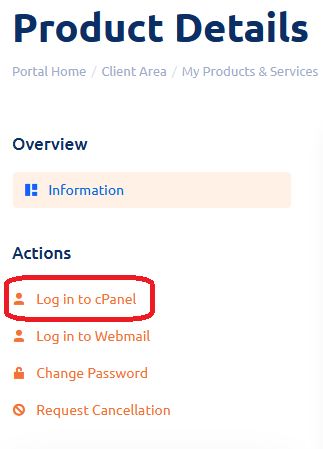
Step 1: Open WordPress Toolkit, Click on WordPress Toolkit. 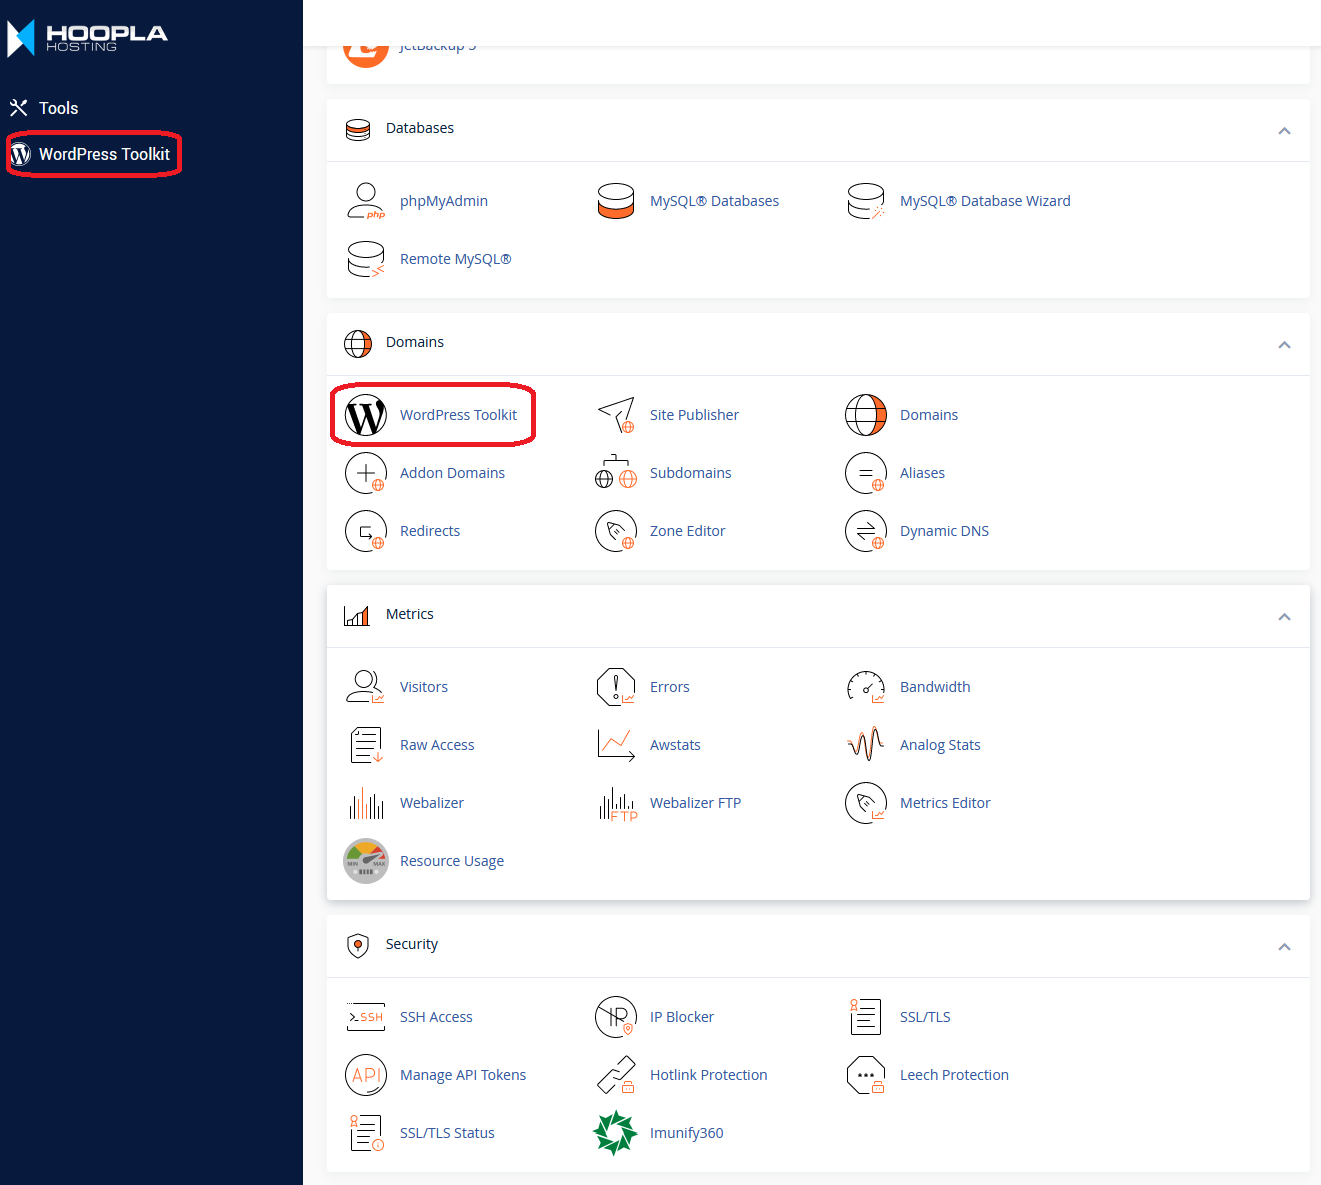
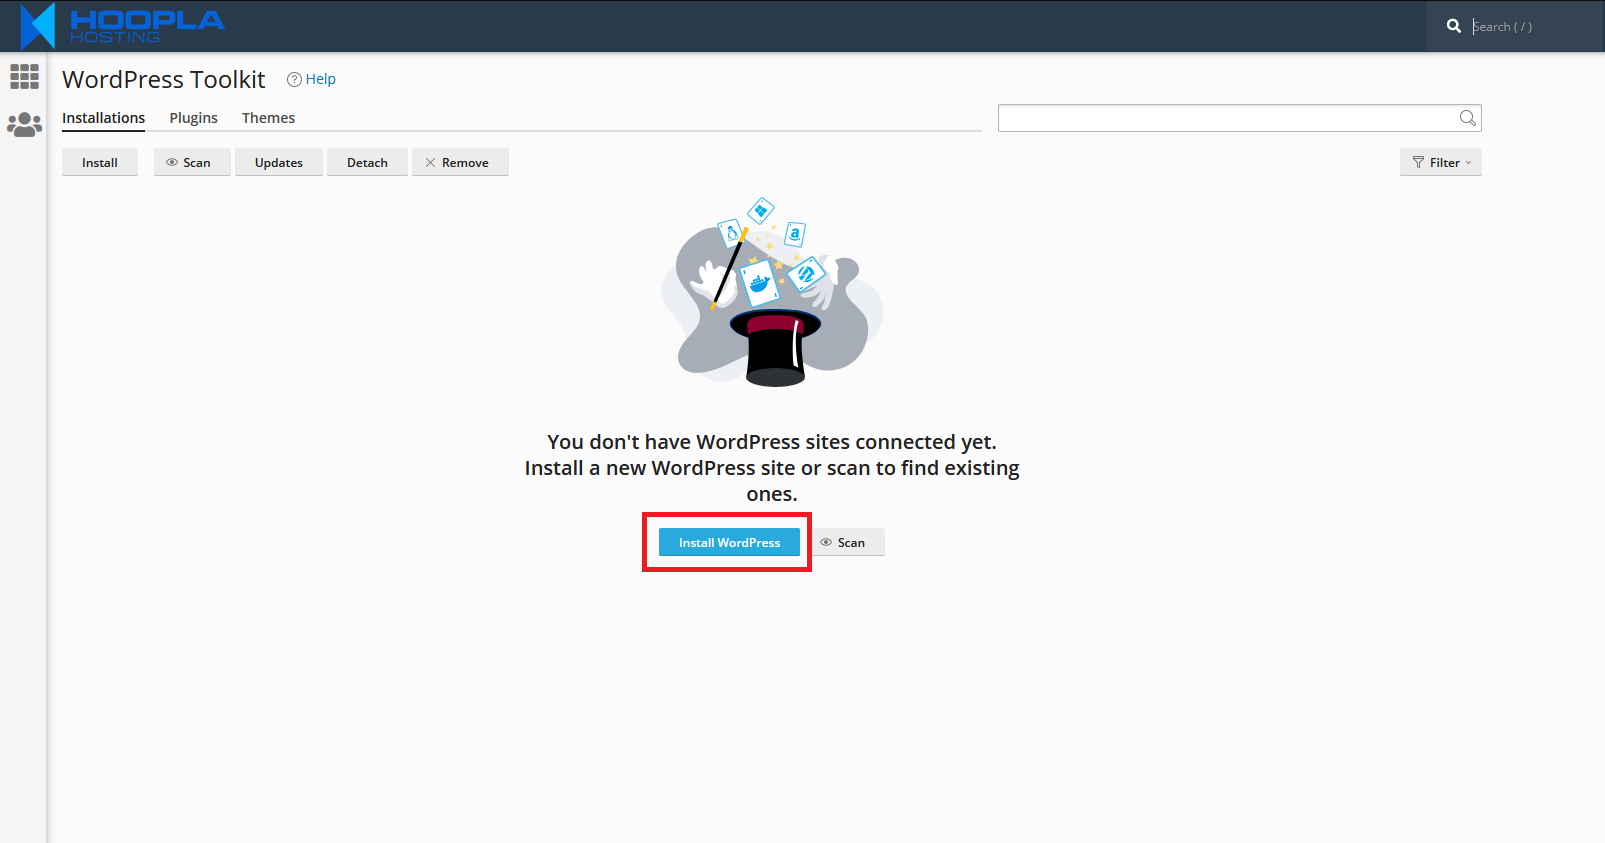
Step 2: Select Install WordPress to start the installation process.
- Click on Install WordPress
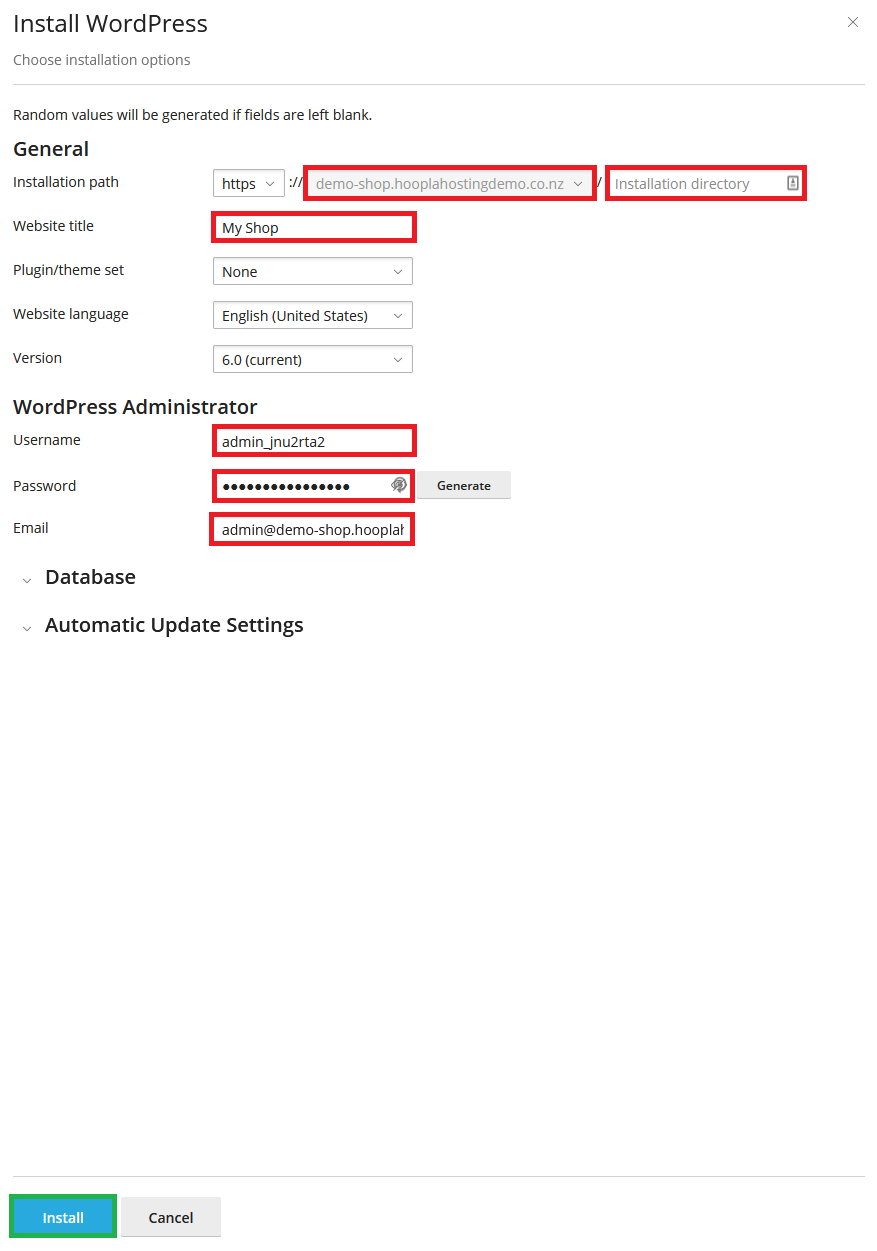
Step 3: Configure WordPress installation
- Select the domain which you want to use for your WordPress install.
- Remove folder name from installation directory unless you want to install to a folder e.g yourwebsite.co.nz/websitename
- Enter your website title
- Enter your new admin username
- Enter your new admin password
- Enter your email address for admin account recovery
- Click install.
Step 4: Await installation.
Step 5: Install complete - Login to your new Wordpress.
You can now login to your new WordPress by clicking on ' Login '.
Or
You can login to your new website via yourdomain.co.nz/wp-admin 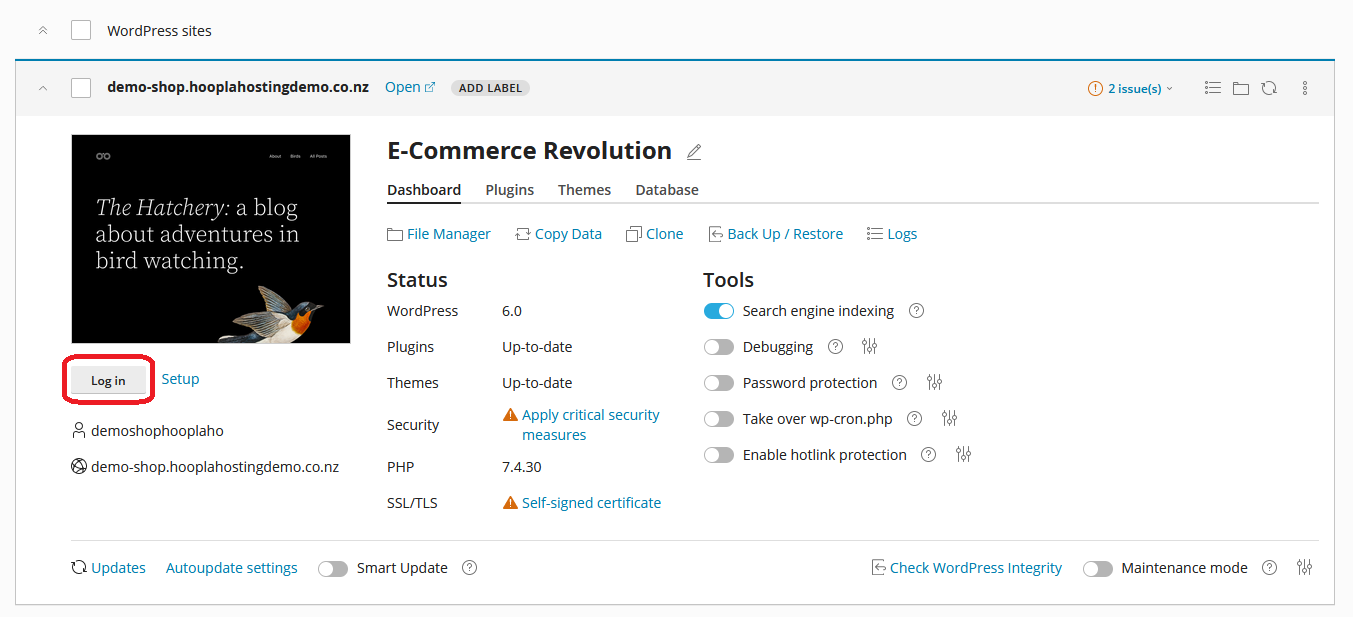
WordPress Toolkit is available with all Hoopla Hosting plans with cPanel.
Check out our Web Hosting plans - all compatible with WordPress.
